I definitely wouldn’t say I have the typical “sweet tooth”. I mean, I like sweets, but I’m definitely more of a savory type of person. This is probably why cheesecake is one of my all-time favorite desserts, it’s a mixture of savory and sweet. When I was younger, instead of a traditional birthday cake, I would always request something like a Tiramisu or a Strawberry Cheesecake.
Today, I’m sharing a recipe for a traditional strawberry cheesecake with a little bit of a twist for Valentine’s Day! I’ve never been huge on celebrating Valentine’s Day by going all out with presents and everything, but I do love any excuse for special food! A few years ago, I hosted a DIY Pizza Party, on Valentine’s Day. I just got together with friends and we made our own pizzas and drank lots of wine! It was delicious and I definitely recommend it for Valentine’s Day!
This year I wanted to try something new, with incorporating one of my favorite desserts but making it festive. If you’ve never made cheesecake before, it’s pretty simple and requires only a few ingredients, so pretty much anyone can make a cheesecake. There’s a lot of great and easy cheesecake recipes on Pinterest. That’s where I got my inspiration for this cheesecake from, along with where I get my inspiration for pretty much everything! Two cheesecake recipes that I definitely recommend are from Baked by an Introvert and Baker by Nature.
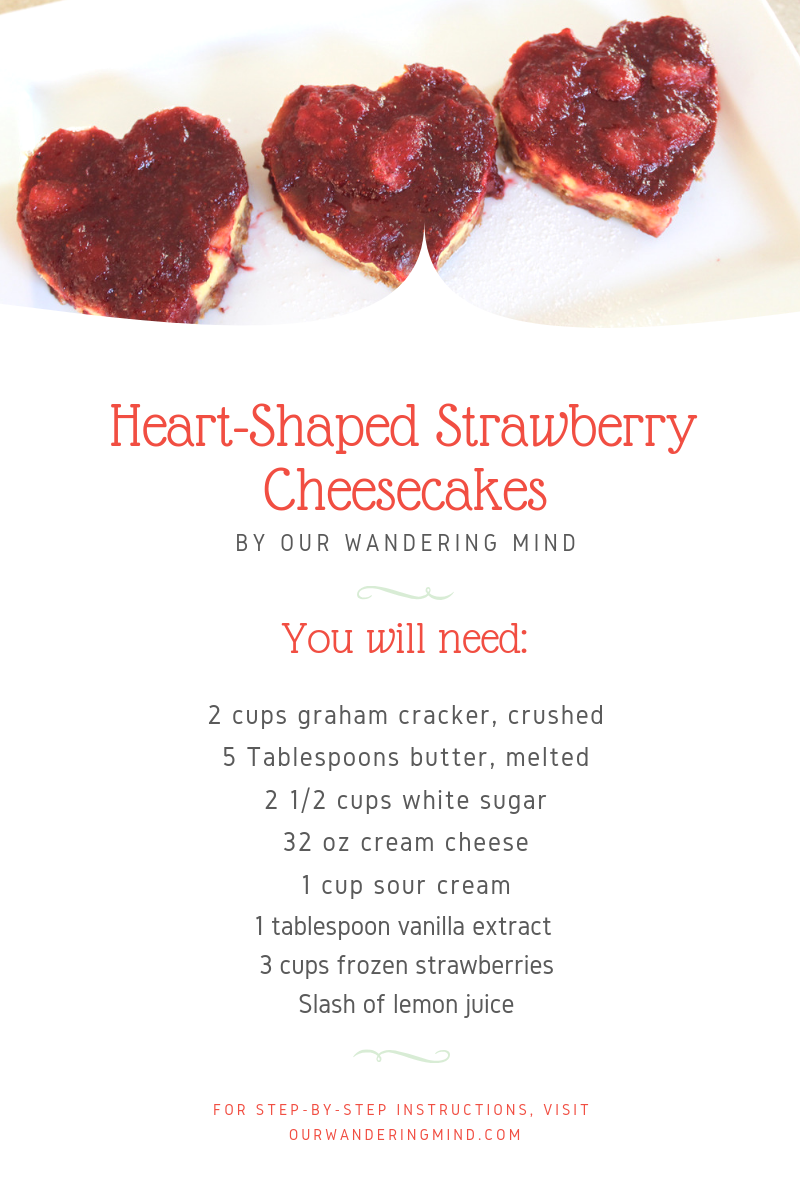
In today’s post, I’m going to show you step-by-step how to make your own Mini Heart Strawberry Cheesecakes! They’re incredibly delicious and perfect for anything from a delicious dessert for a romantic evening to making them for a kid’s Valentine’s Day party! I hope you that not only you find some baking inspiration from this blog post, but also shows you just how truly easy baking something delicious and impressive can be.
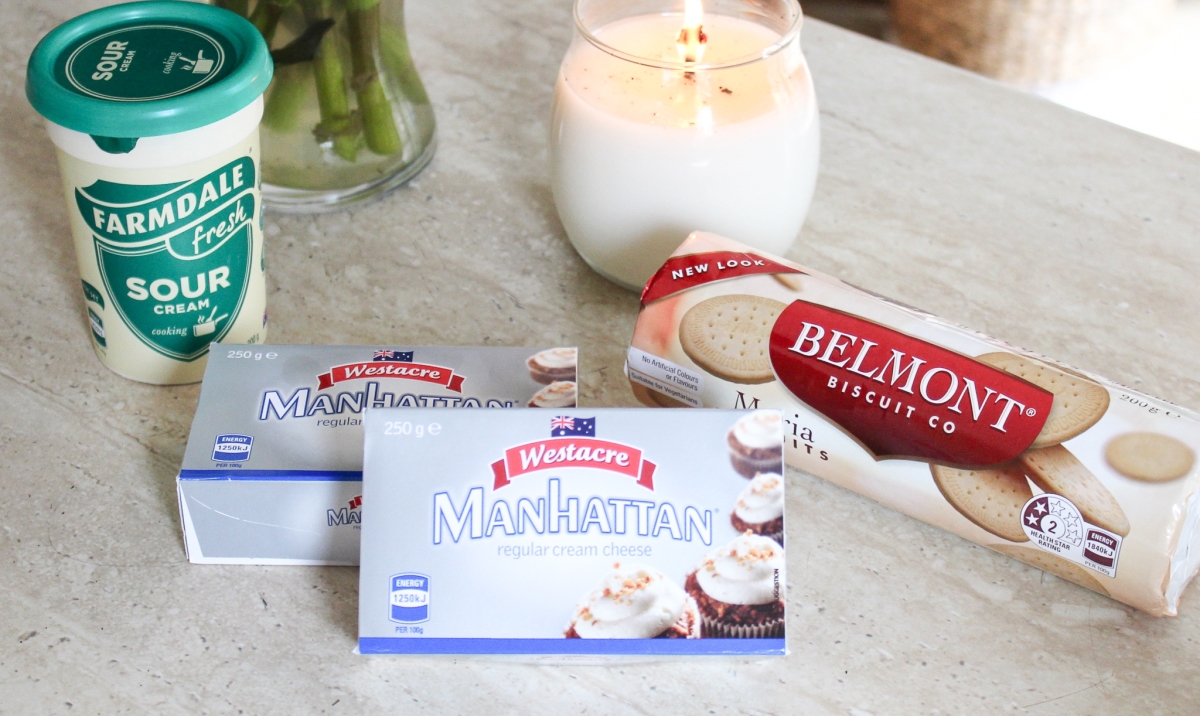
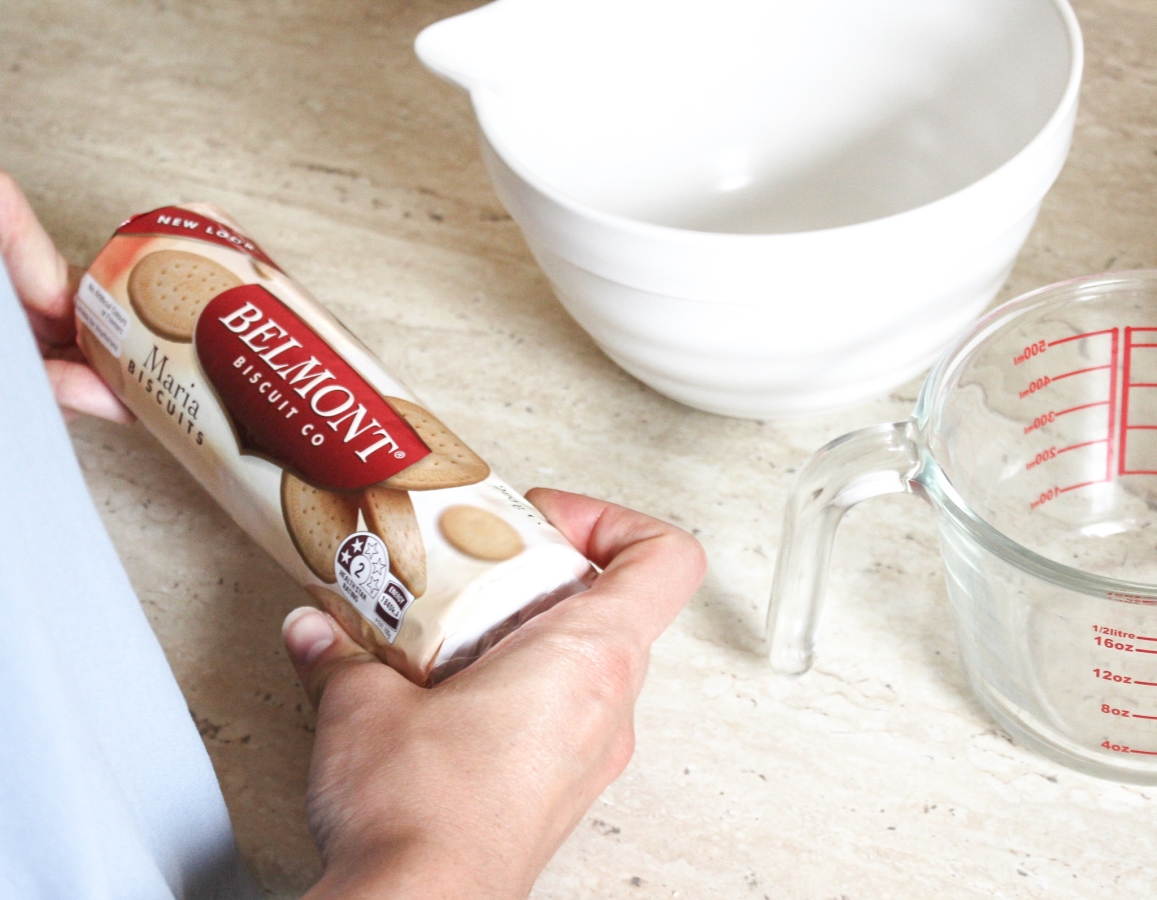
As I mentioned, the ingredients could not be easier for this Strawberry Cheesecake. A lot of items you’ll probably already have in your pantry beforehand. What you’ll need to make this Strawberry cheesecake is cream cheese, a cheesecake staple, sour cream, sugar, eggs, vanilla, butter, strawberries, and a graham cracker type biscuit. In Australia, they don’t have graham crackers, so after doing some research online the Maria Biscuits at Aldi were a popular option in lieu of graham crackers.
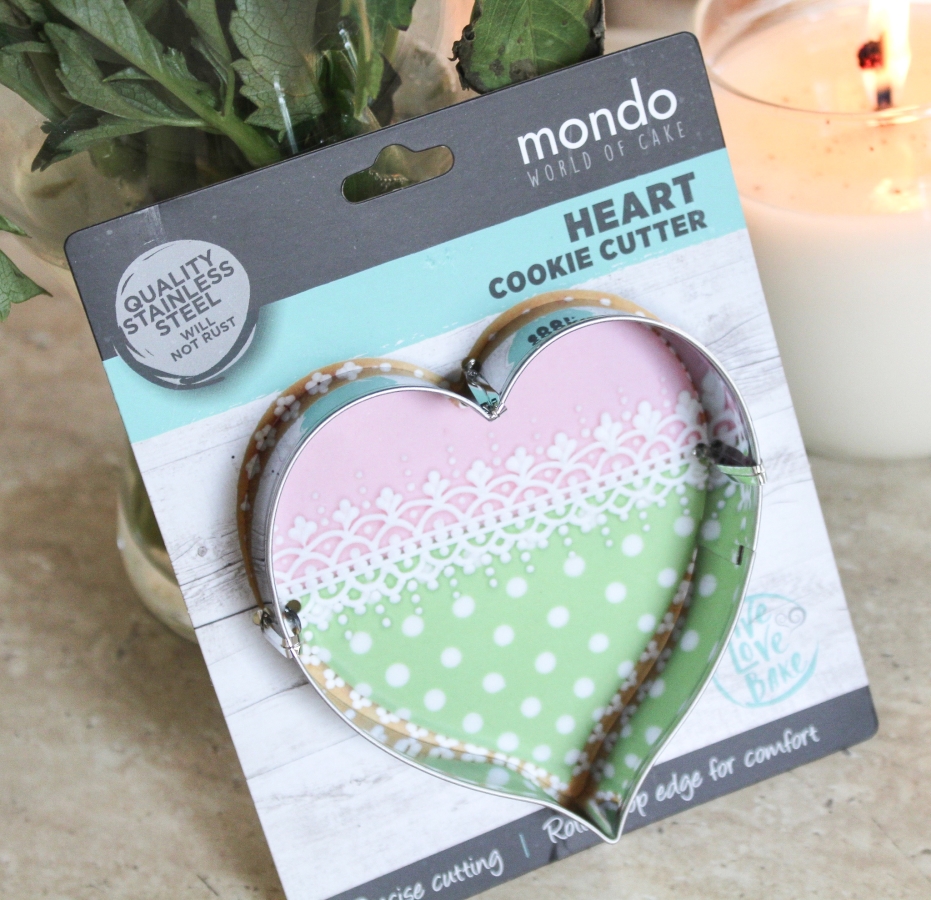
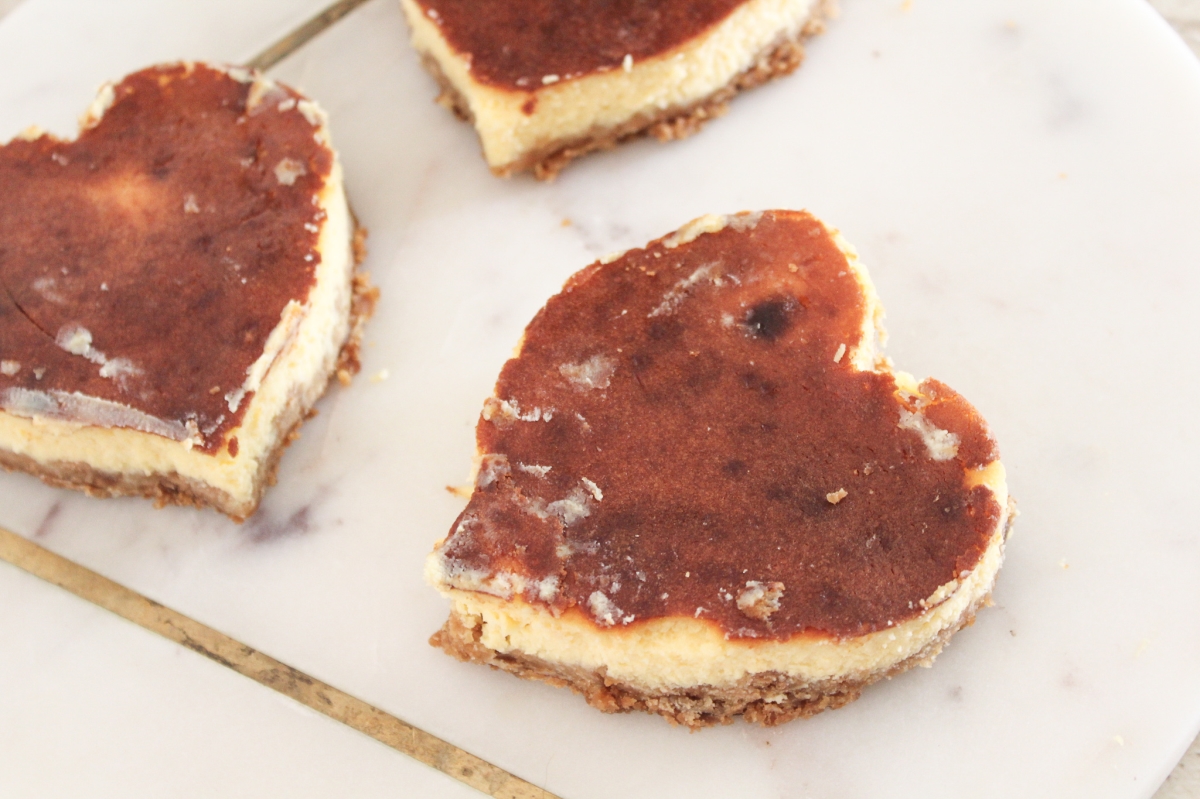
To get the heart shape for the mini cheesecakes, I just picked up this medium-size heart cookie cutter. After going through the entire process, I would definitely recommend simply just getting a large heart-shaped cake pan if you’re looking for something to feed a lot more people and that’s a lot less work! That being said, if you’re just feeding a couple of people dessert, I absolutely loved how adorable these mini heart-shaped cheesecakes turned out.
The first thing you want to do when making the Heart-Shaped Strawberry Cheesecake is take all your ingredients out and set them on the counter. I like to do this regardless so that everything’s right in front of me and makes the process a lot less stressful with not having to search for different ingredients while baking.
However, with cheesecake especially, most, if not all of the ingredients need to be at room temperature when combining them so you might as well set everything out ahead of time.
The Crust
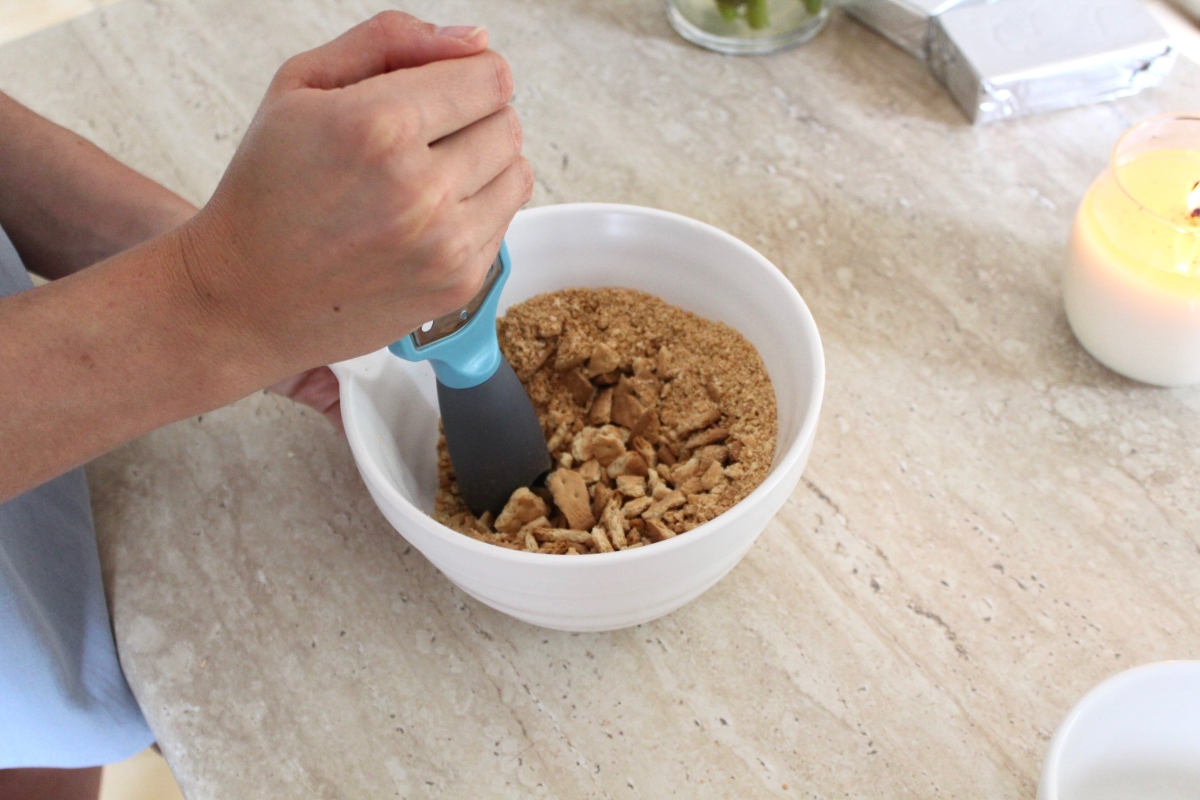
While the cream cheese is sitting out and softening, take your graham cracker biscuits and start breaking them apart in a mixing bowl. I started just by using my hands to break apart the biscuits, but as this will be the base of our cheesecake, the chunks need to be more finely milled.
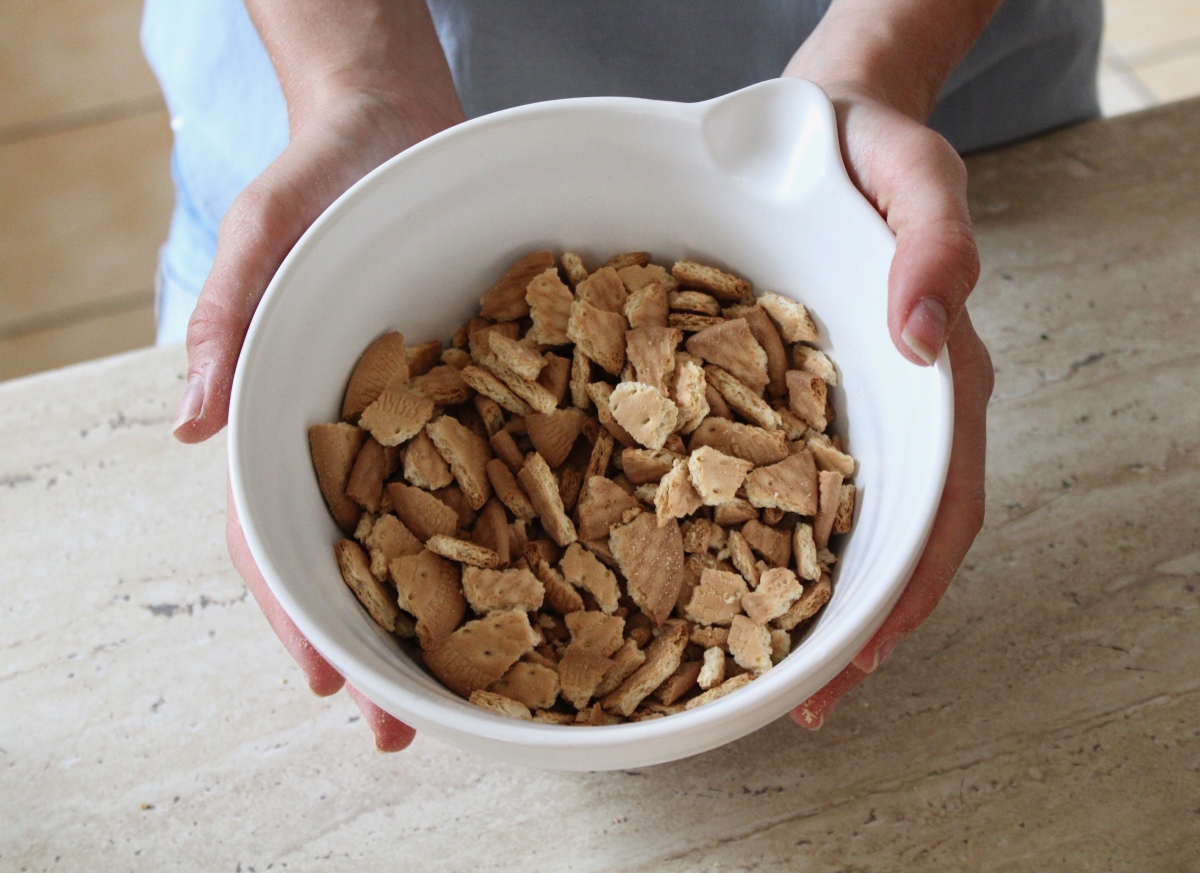
After getting tired of using my hands to individually break apart the biscuits, I decided to mash the biscuit pieces with the back of a cheese grater- anything with a large handle will do! If you want to do this step a little faster, you can put the biscuits in a large freezer bag and hit it with a hammer on the outside of the bag as I did to candy canes in my DIY Spiked Peppermint Hot Chocolate in a Jar.
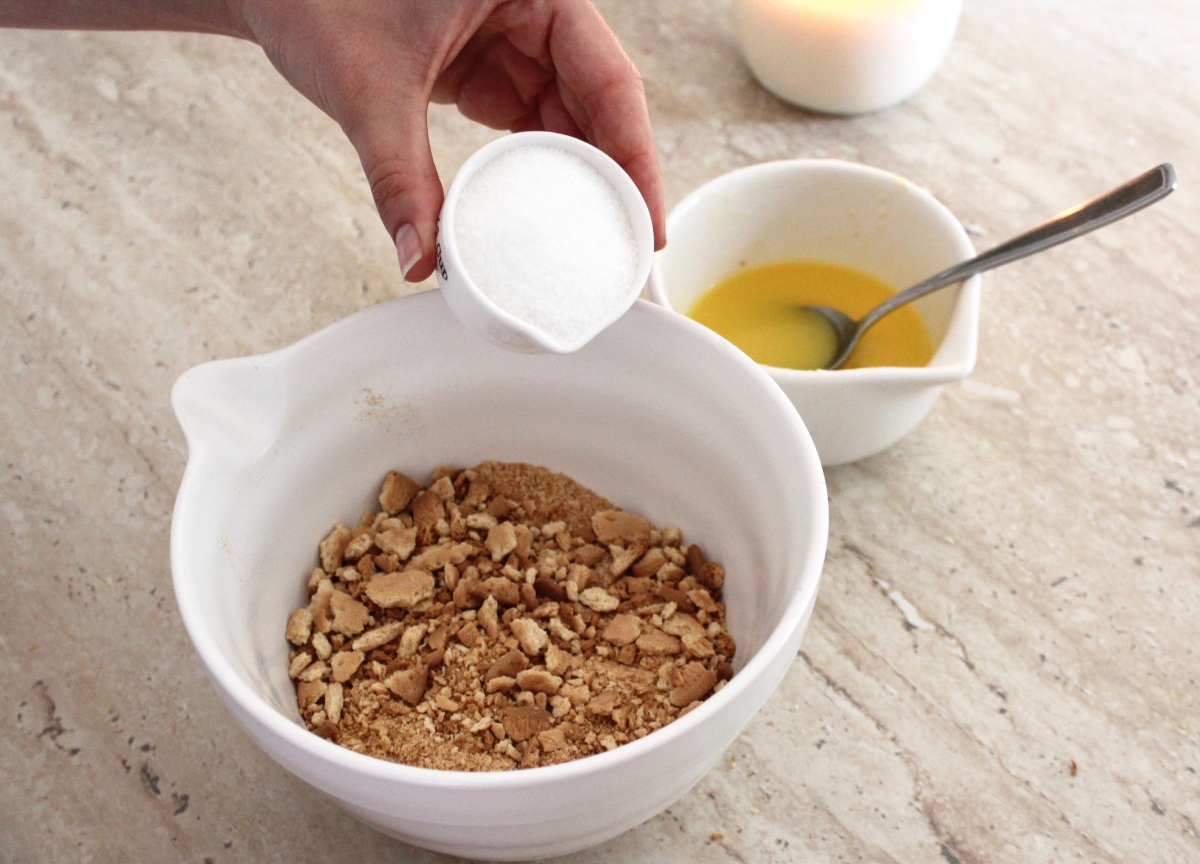
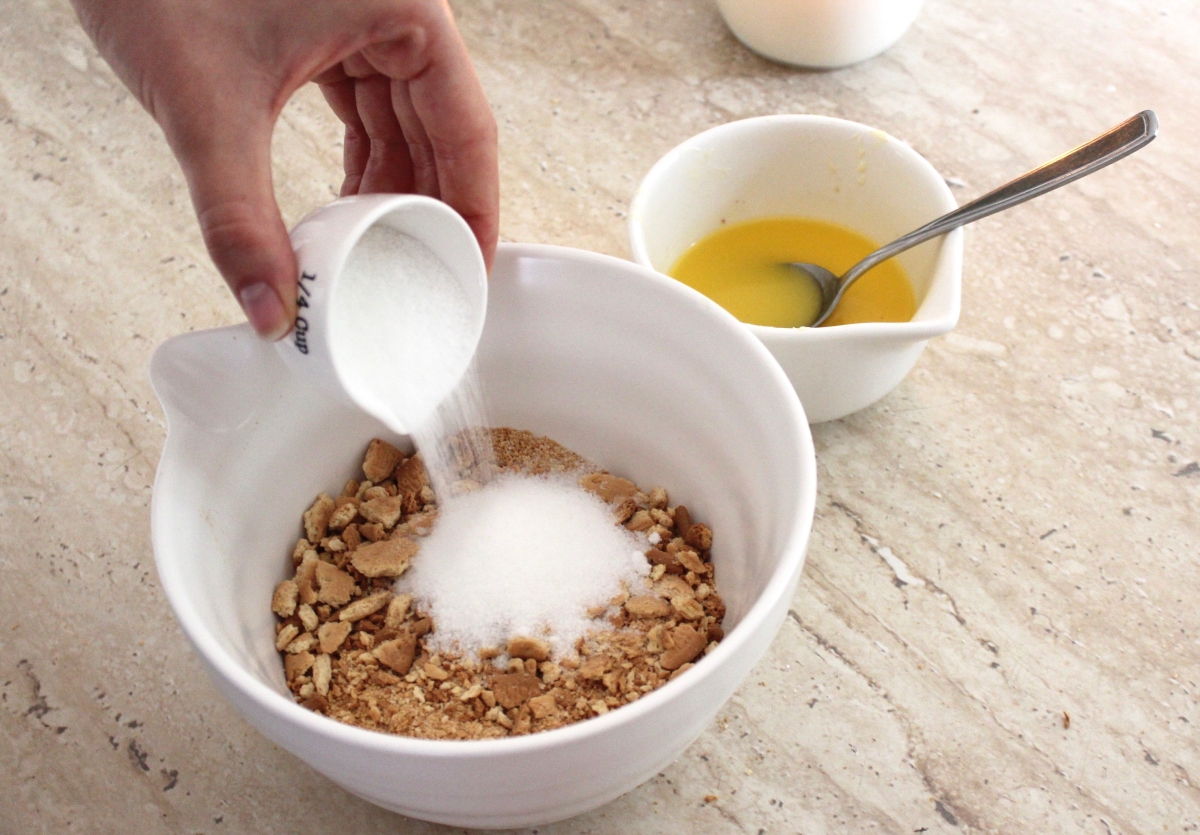
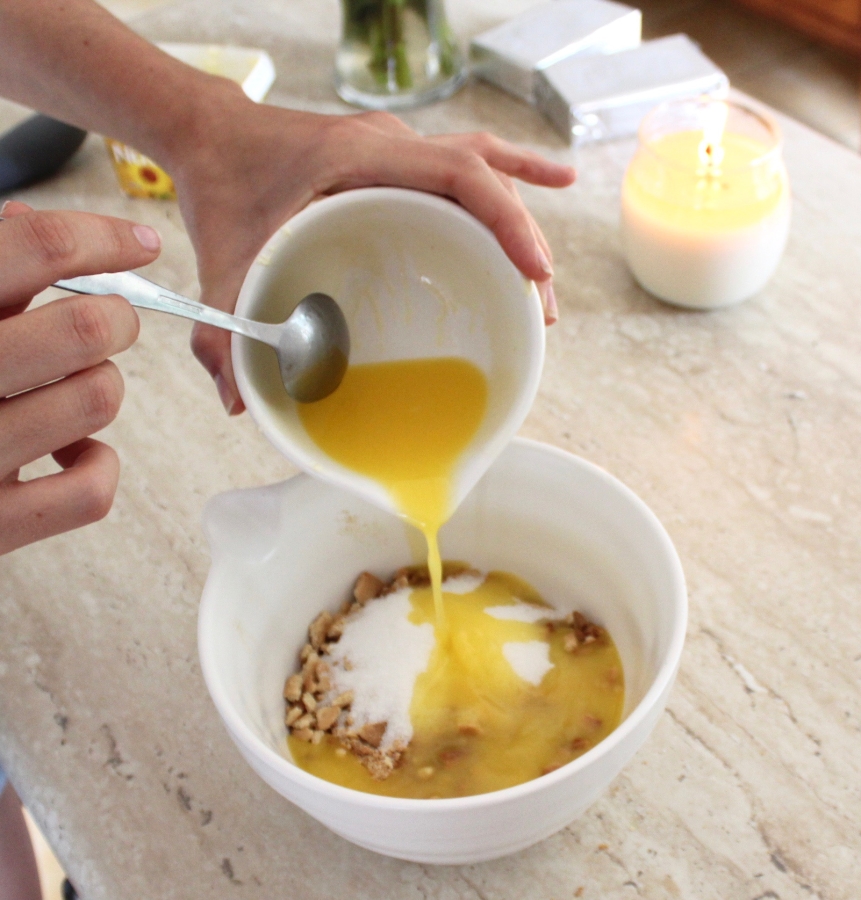
Once your biscuits are to your liking, add your melted butter and sugar in the bowl and mix until combined.

Once combined, pour your crust mixture into your pan of choice. As I’m using a cookie cutter in this recipe, a long, flat, dish made the most sense for me to use. If you’re wanting to bake a traditional cheesecake, using a large circular pan is what you would want to use, and if you wanted to make a large heart-shaped cheesecake, you would do this same step in the heart-shaped pan instead.
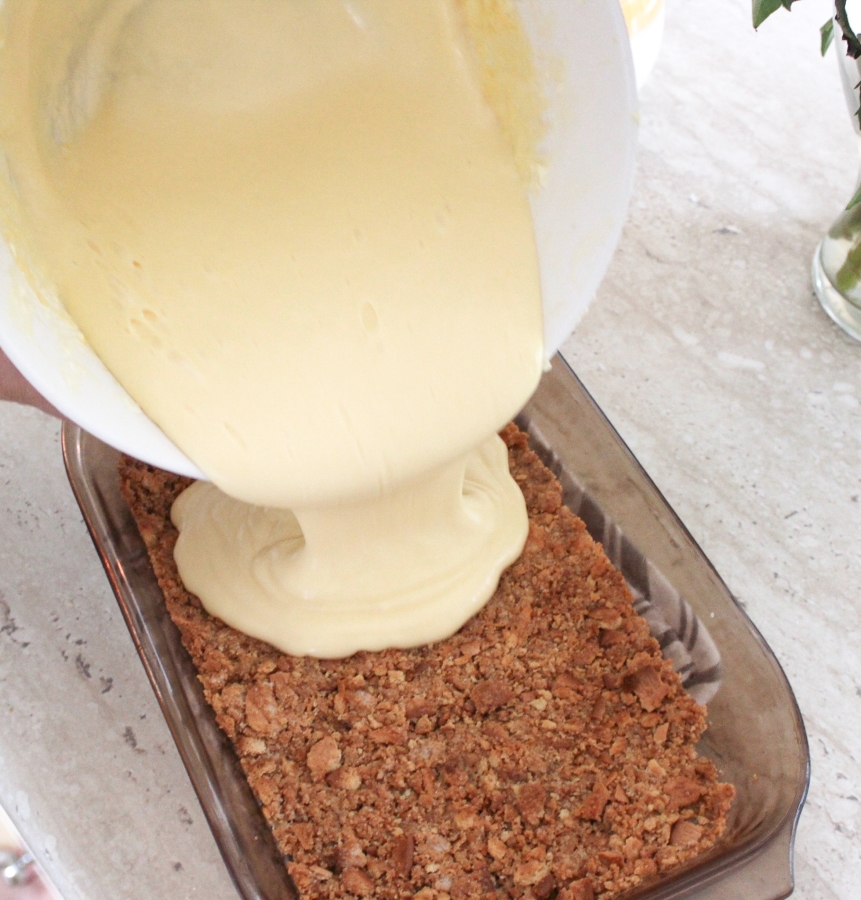
Once all the crust is on the pan, spread the crust using your fingers into a flat and even layer, covering the whole pan.

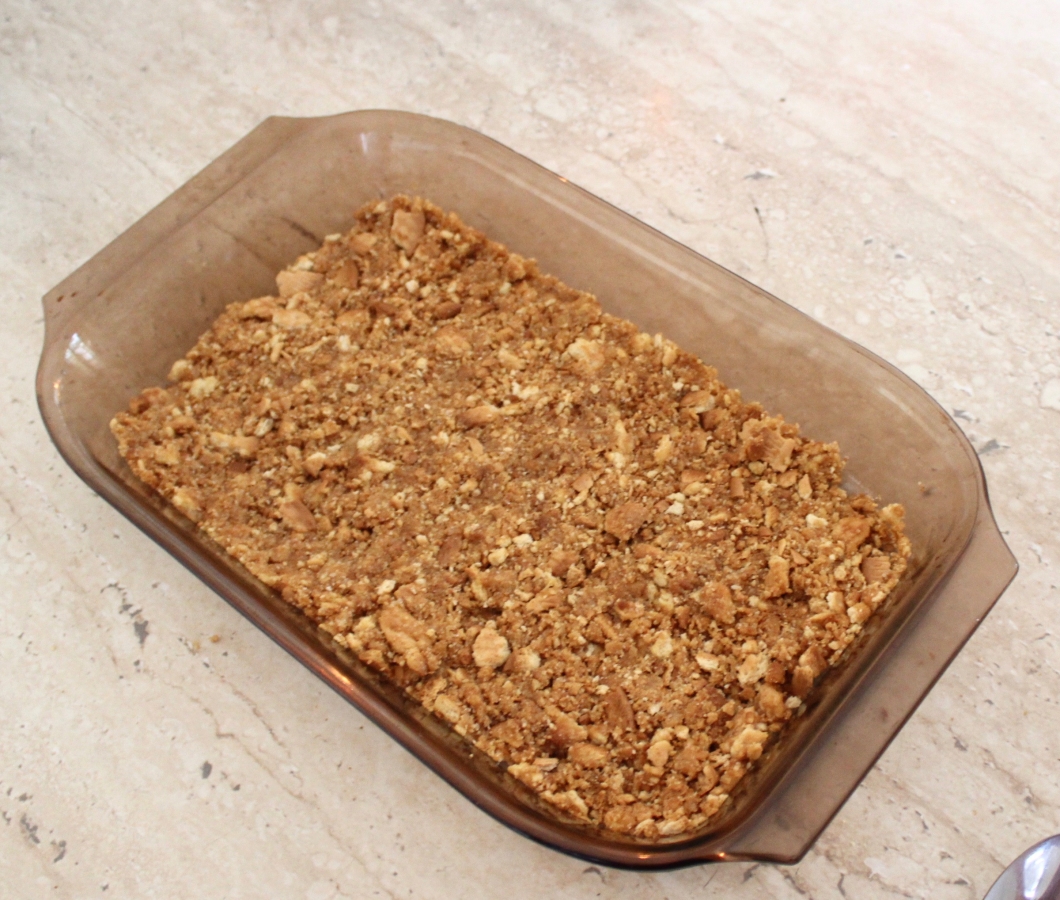
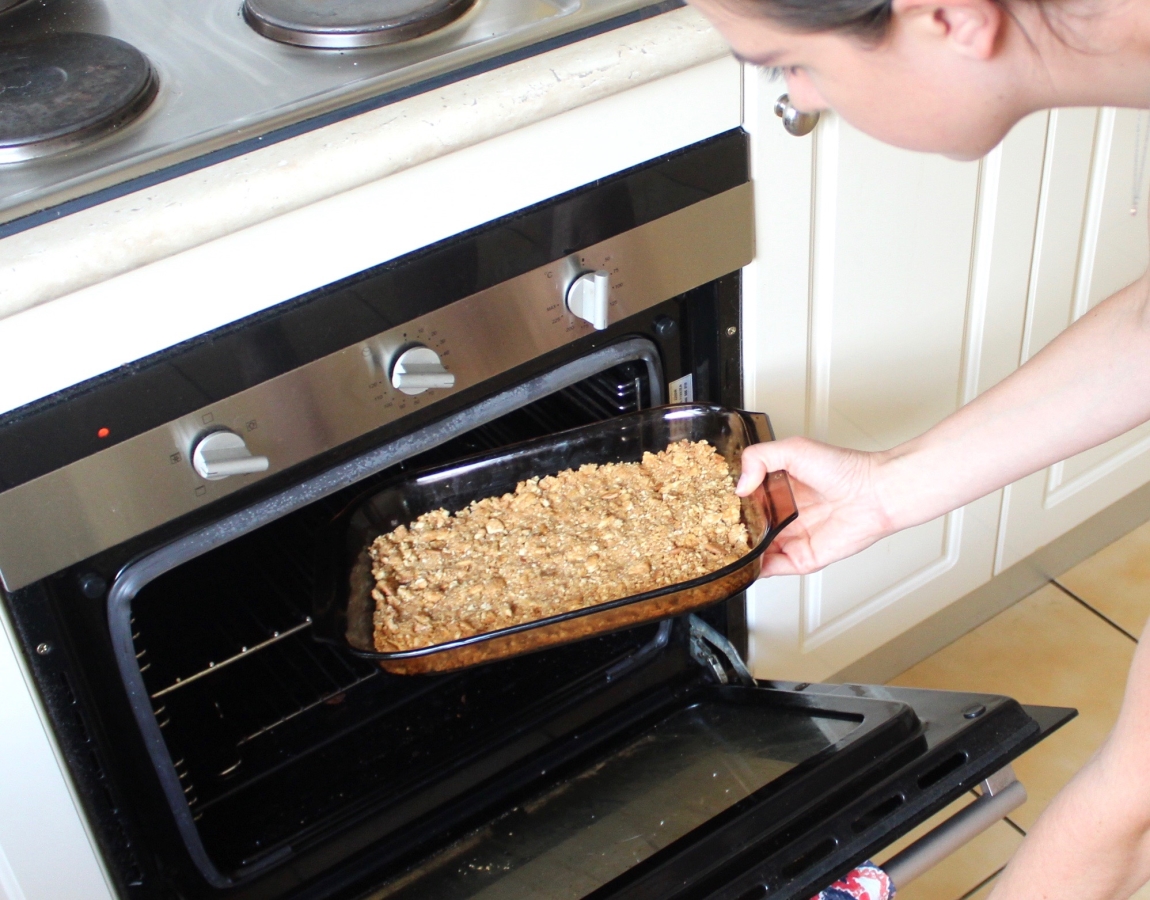
You’ll want to bake the crust for about ten minutes in the oven and let it cool when it’s done.
The Filling
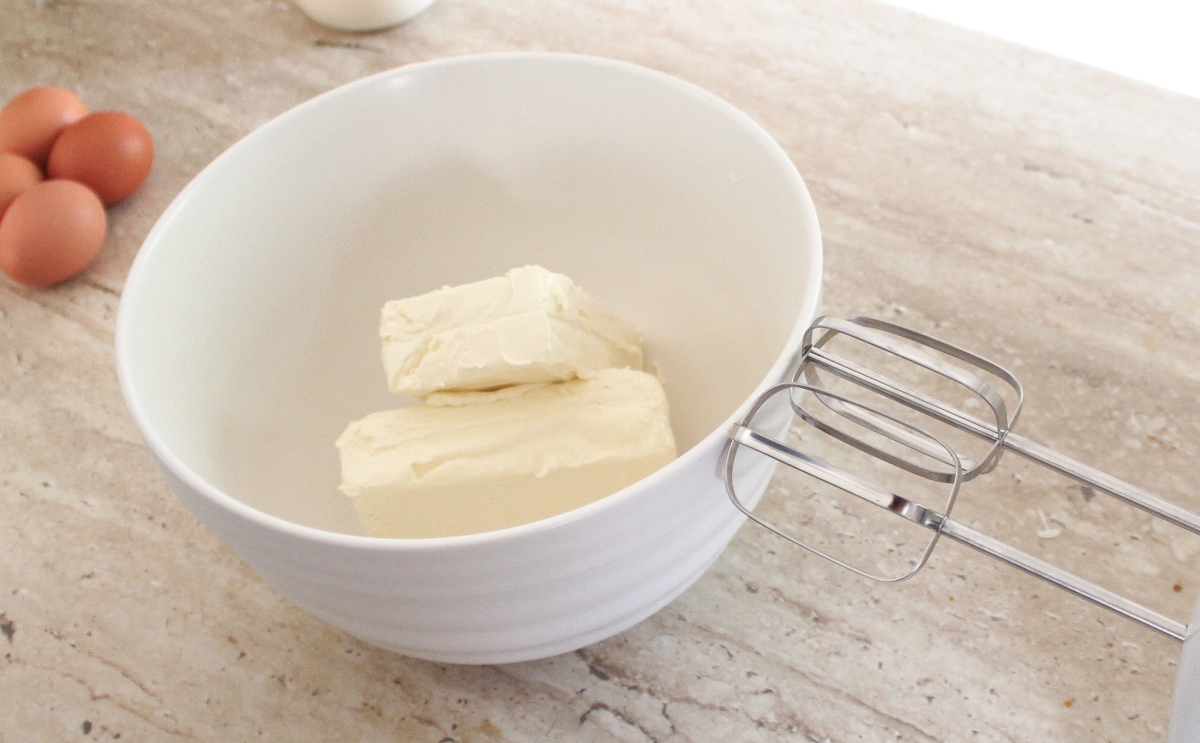
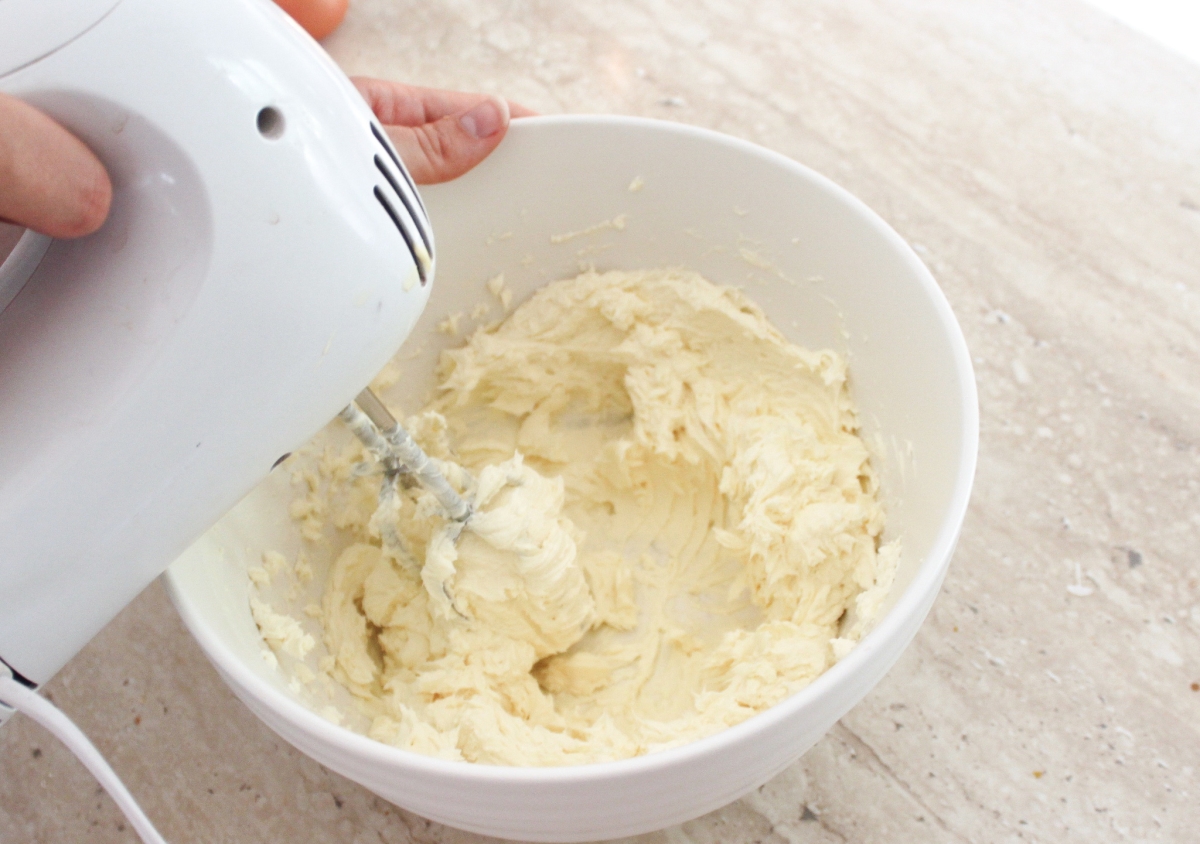
While your crust is baking, you can get started on your cream cheese filling. By now your cream cheese should be soft. Add your two packages of cream cheese into a mixing bowl and using an electric mixer or a stand mixer, mix your cream cheese until it’s fluffy.
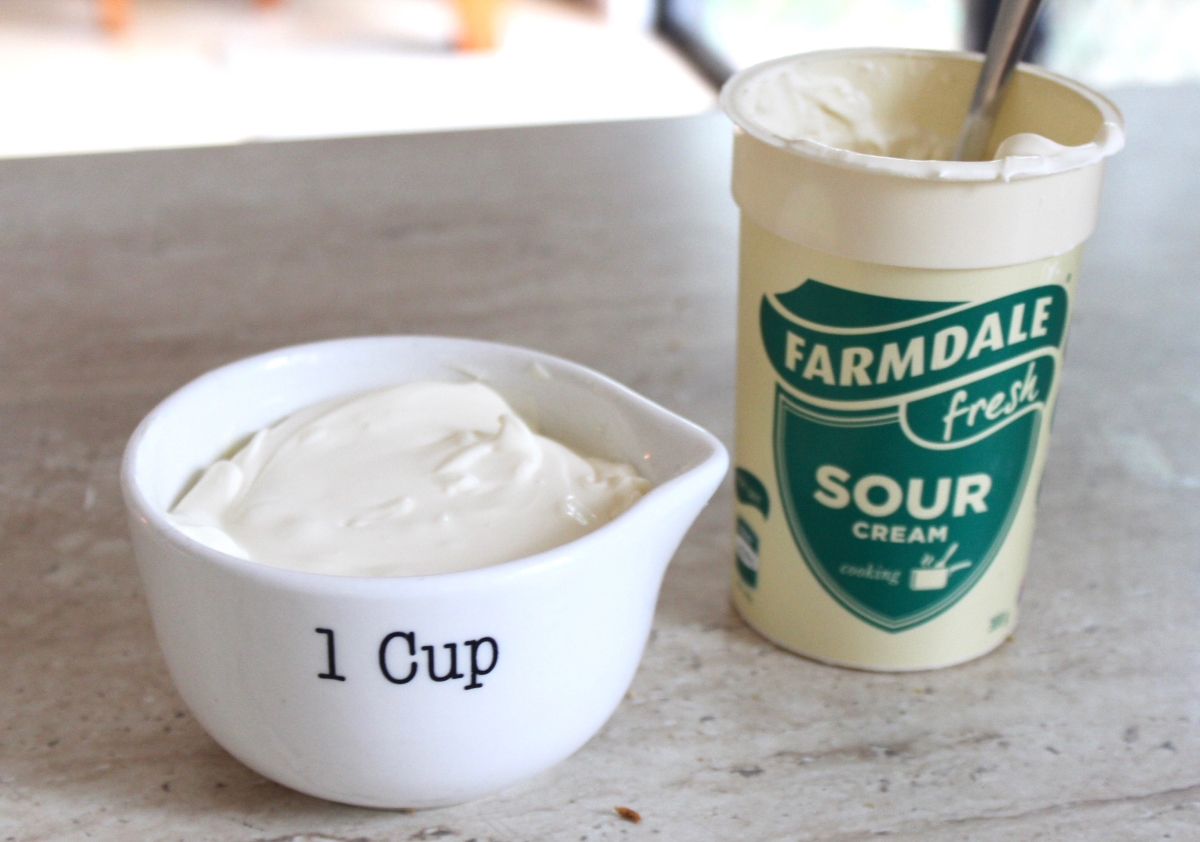
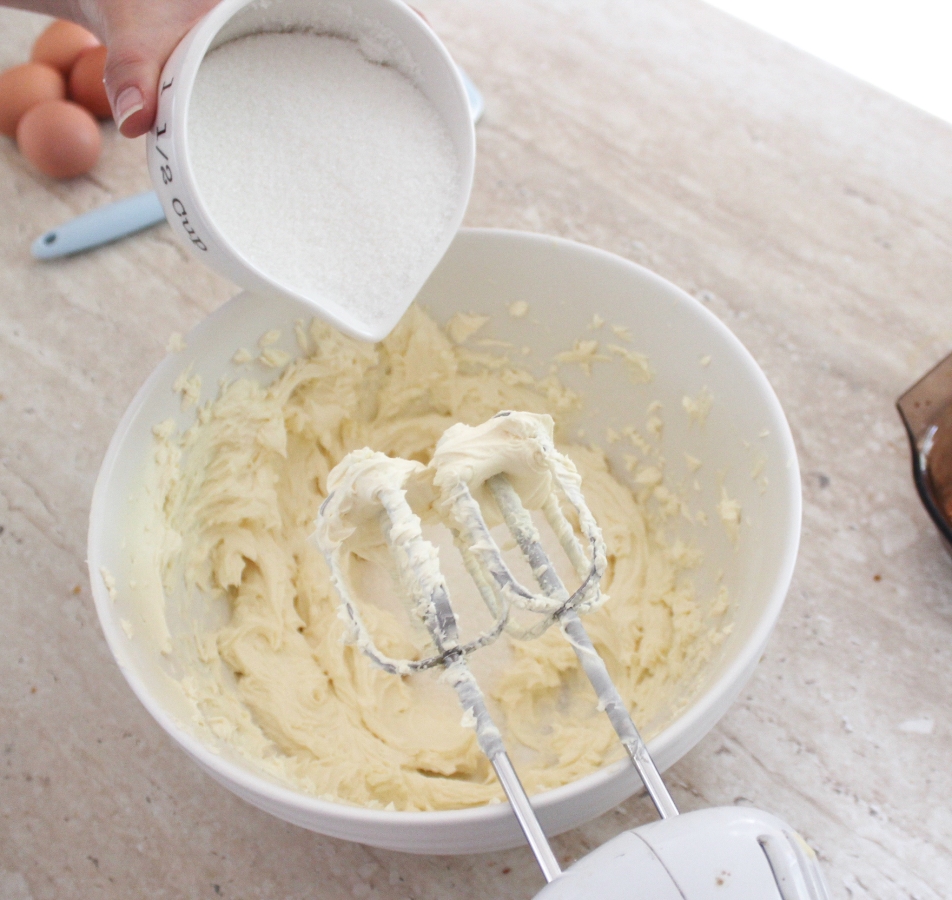
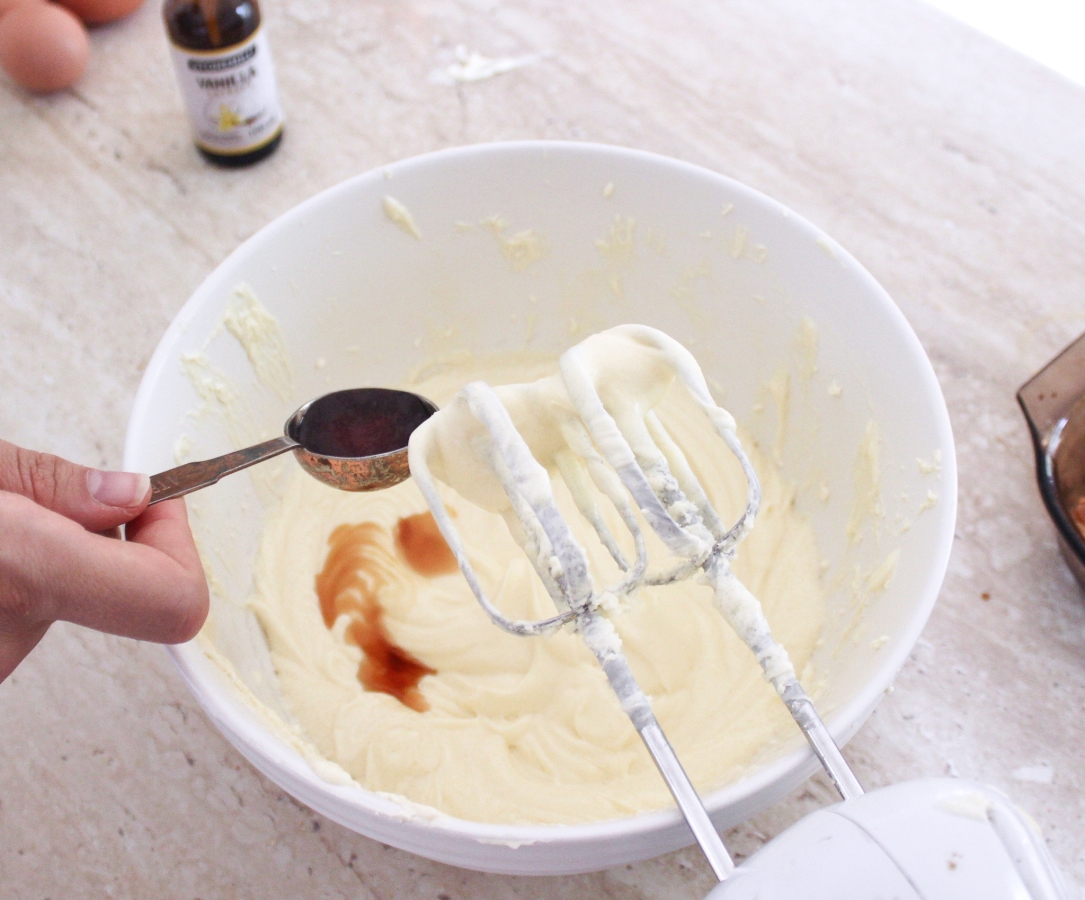
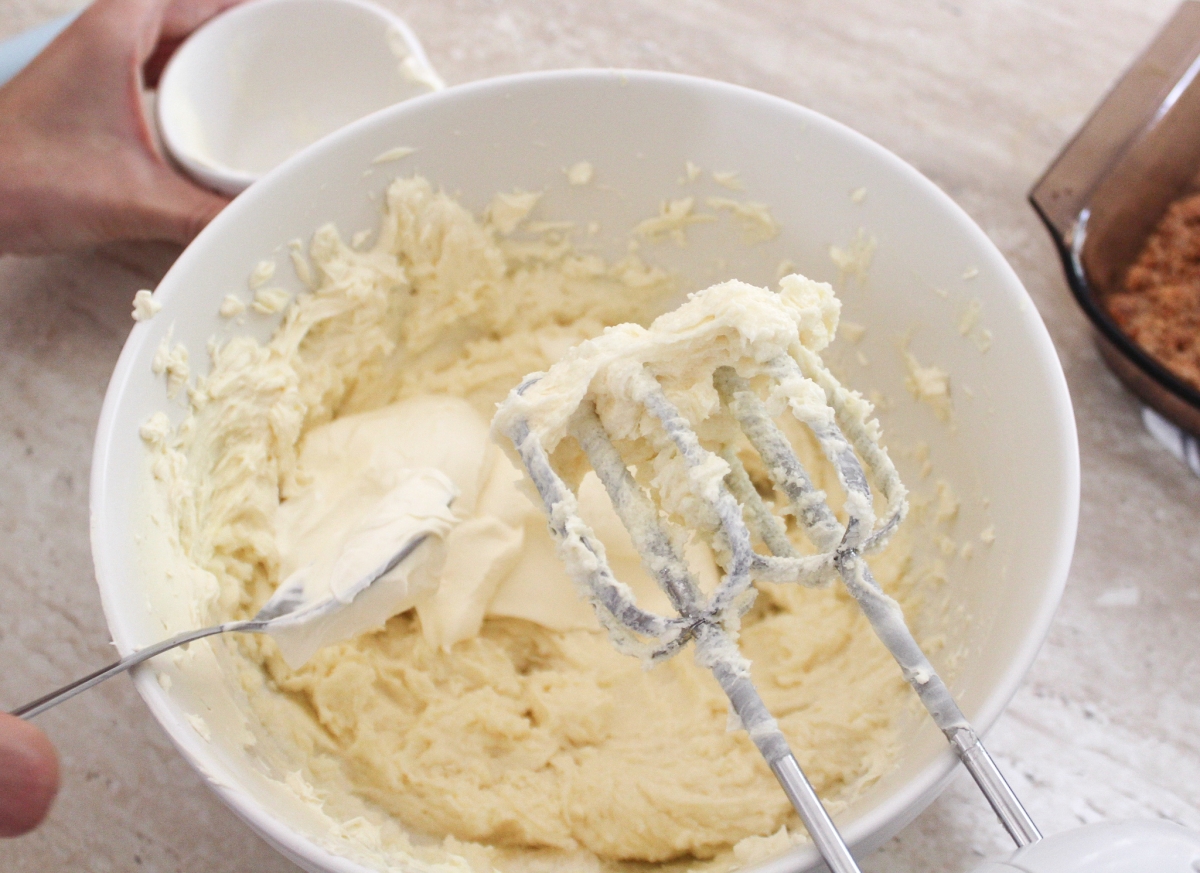
Once your cream cheese is nice and fluffy, you can start adding your other ingredients such as sugar, vanilla, and sour cream. Mix to combine.
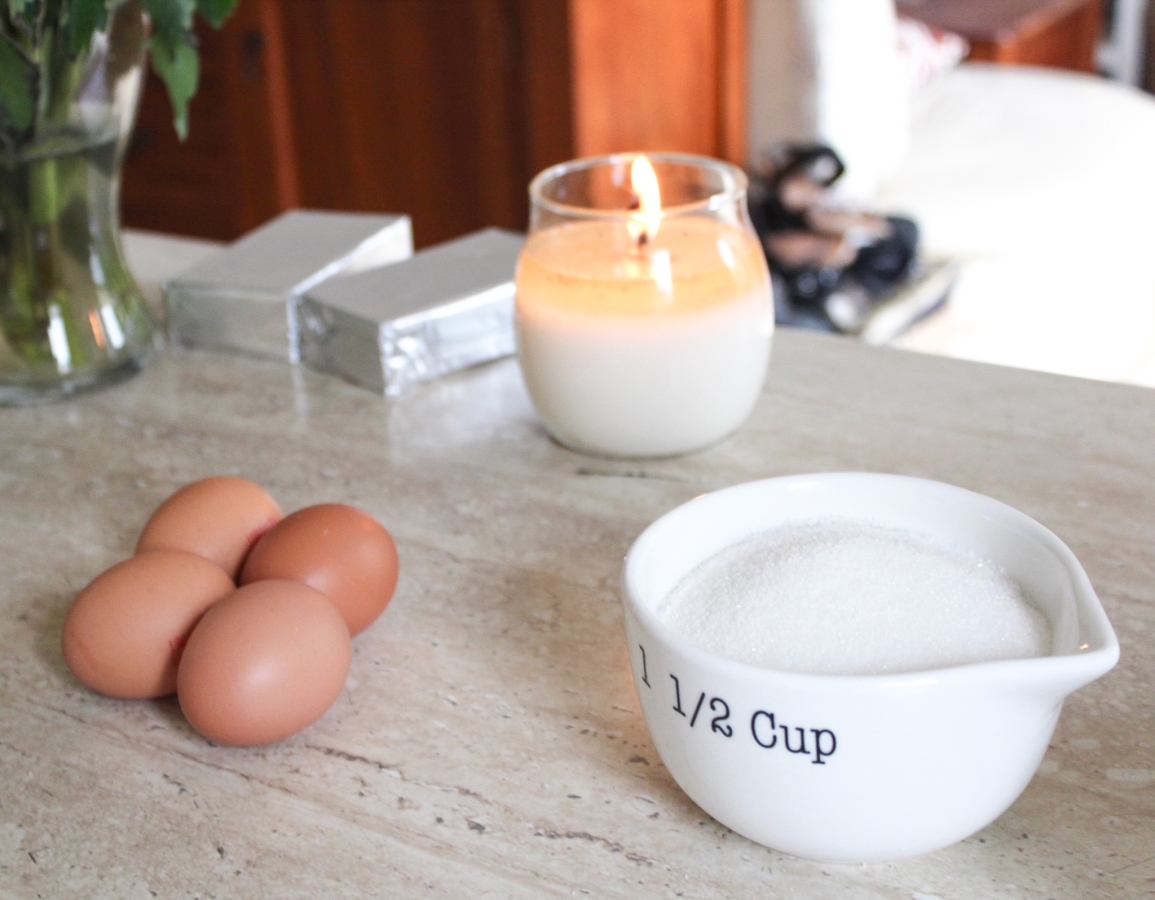
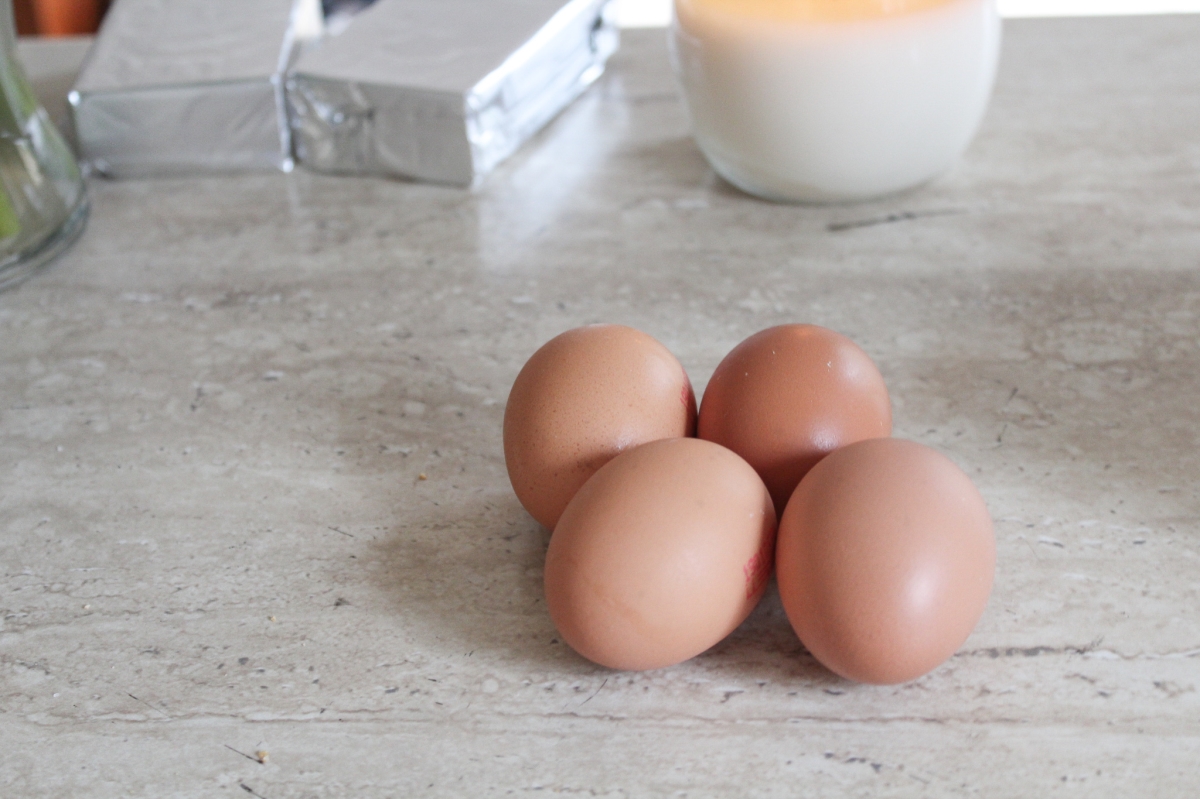
When all your ingredients are combined and your cream cheese mixture is fluffy, you can add your eggs. You can either beat your eggs in a separate bowl first and then add them or you can do what I did, and just add your eggs straight to the mixing bowl and mix it in with the cream cheese filling.
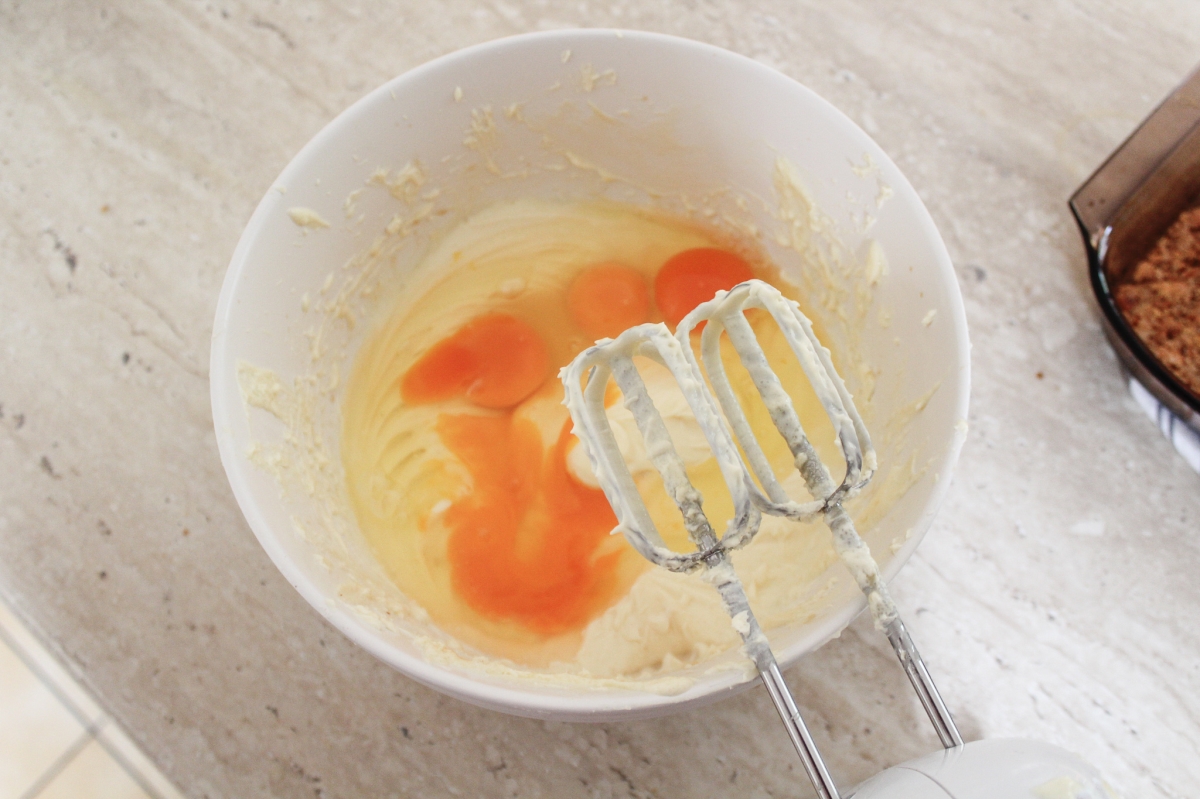
That’s it for your cheesecake filling! As I said, it’s super easy!
Once your crust has cooled a little bit, you can add your cheesecake filling onto the top of the crust. Make sure that it’s a nice even layer on the pan.
If you’re worried about your cheesecake cracking, you can make a water bath for your cheesecake by putting your cheesecake pan in another, larger, pan with a little bit of water in the oven. This step should hopefully help you avoid any cracking in your cheesecake. However, since my cheesecake is going to be covered with a strawberry sauce anyways, I wasn’t too worried about it cracking.
You’ll cheesecake will need to bake for about an hour. Once your cheesecake has cooled down, transfer it onto a cutting board to make it easy to use the cookie cutter.

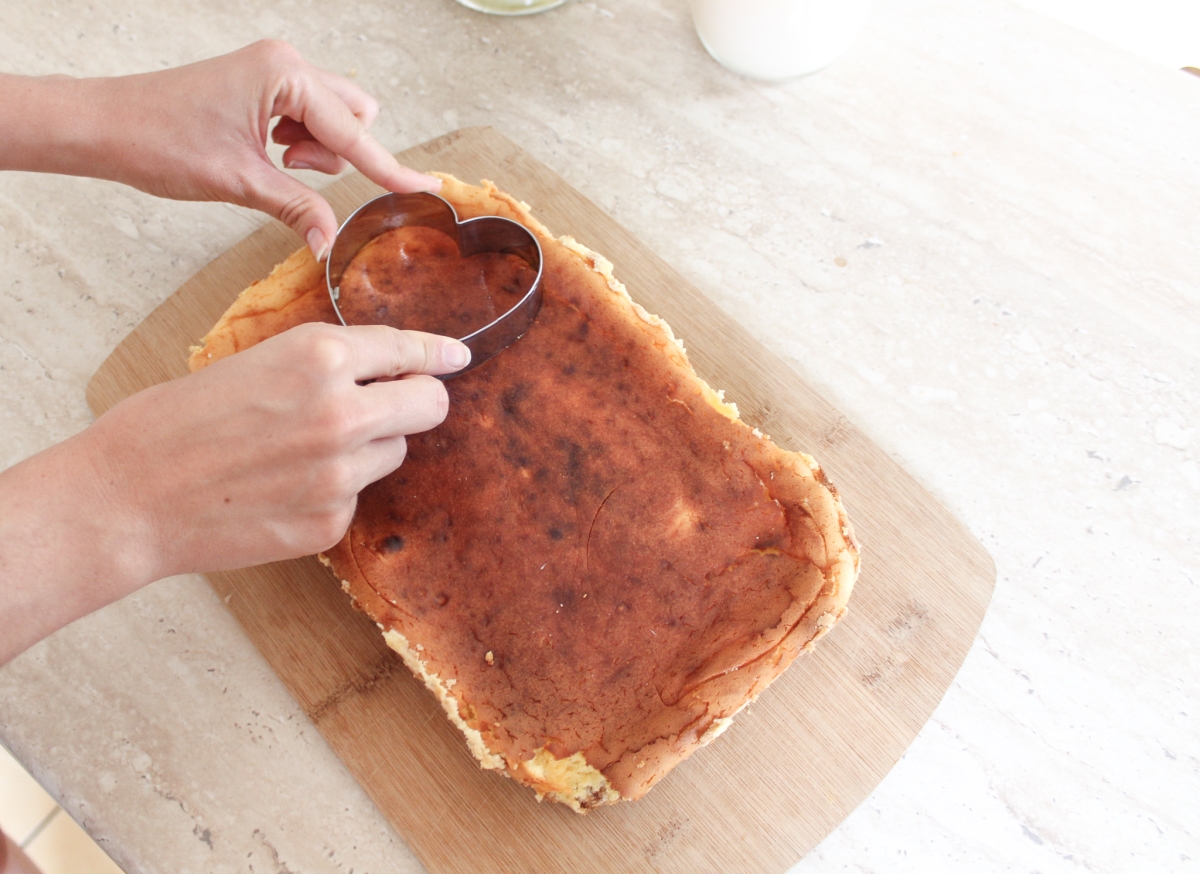

After pressing the heart-shaped cookie cutter in my cheesecake, I used a knife to cut around the edges. As I mentioned, the cheesecake will be covered with a strawberry sauce so it doesn’t have to look absolutely perfect.
Since you will have leftover cheesecake if you’re using a cookie cutter, I definitely recommend not throwing it out and instead of cutting into little cheesecake bites! It’s the perfect tiny dessert if you’re craving a little something sweet during the day!
The Strawberry Sauce
The awesome thing about this strawberry sauce is that it’s incredibly easy, but it’s also exactly how you would make any kind of jam or topping. This recipe can be used for anything from cranberry sauce for Thanksgiving to top off my brie in my Cranberry Baked Brie, by just replacing the strawberries with the desired fruit.
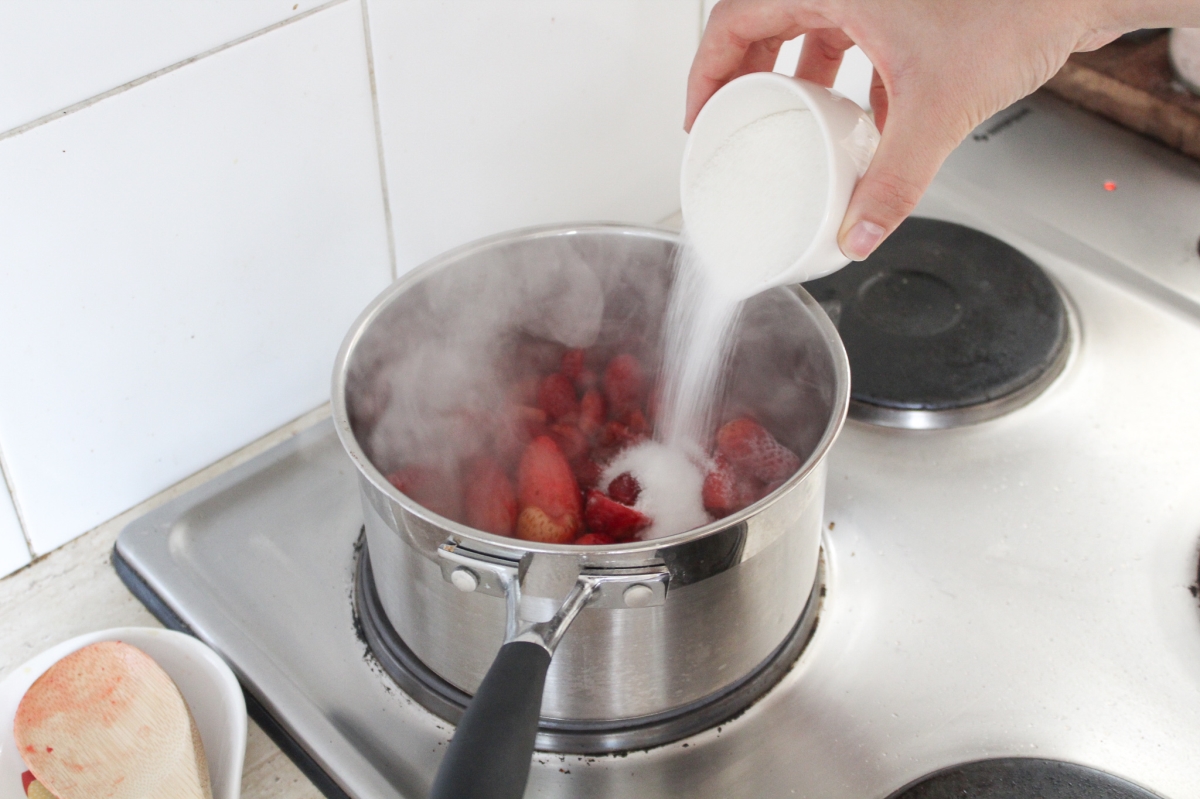
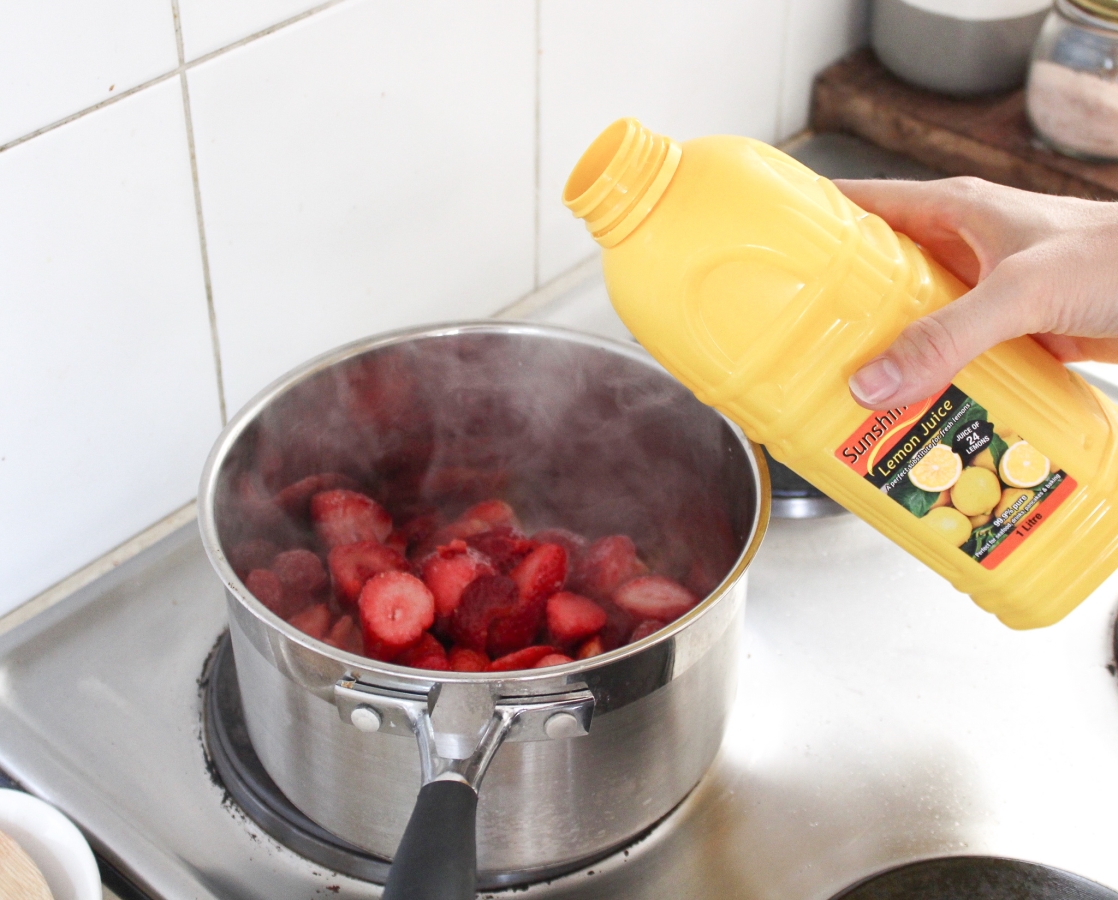
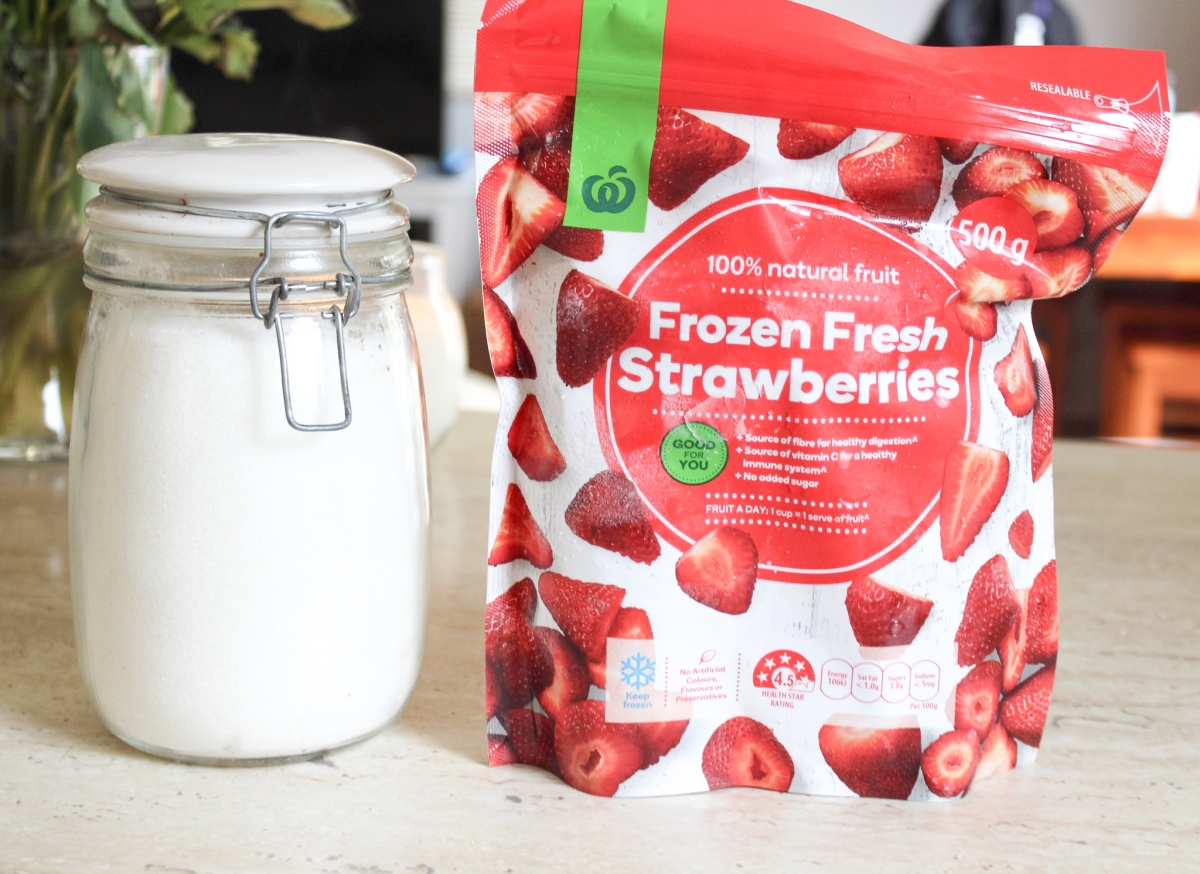
To make the strawberry sauce, just add strawberries, sugar, and a splash of lemon juice in a saucepan over medium to high heat. Stir until the sauce is combined and your desired consistency.
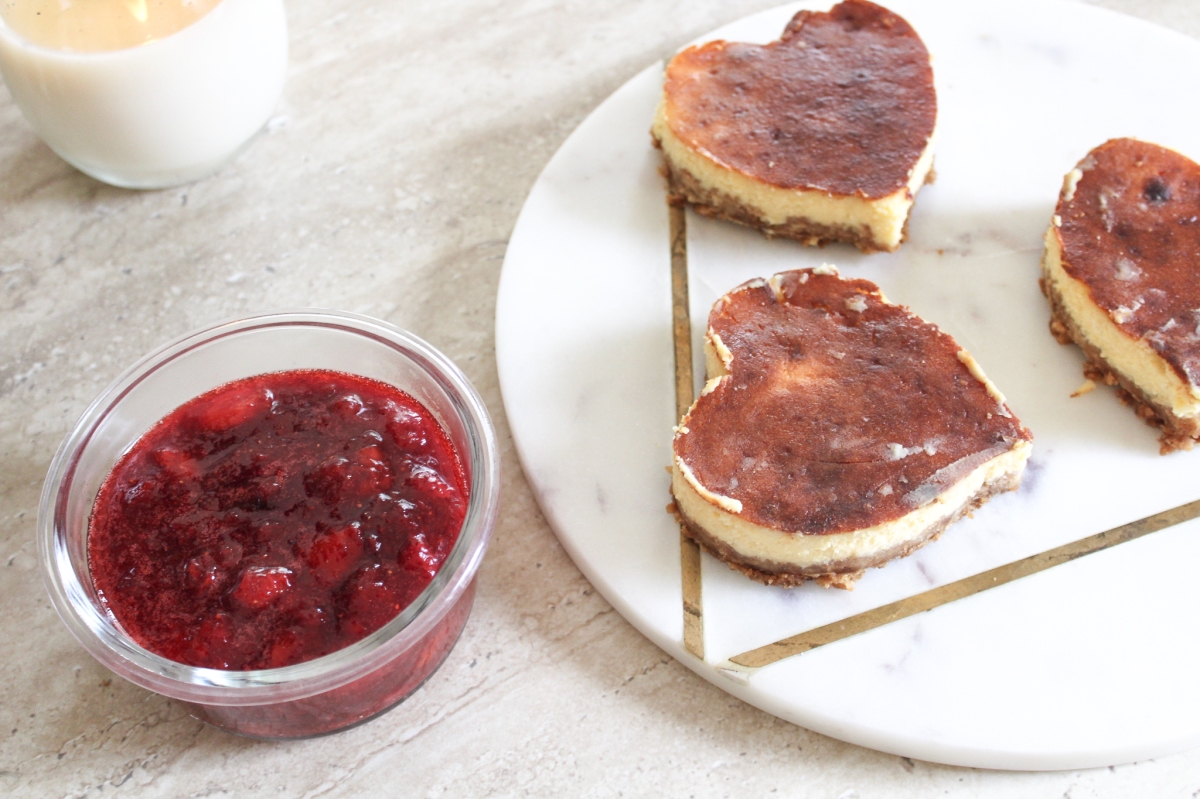
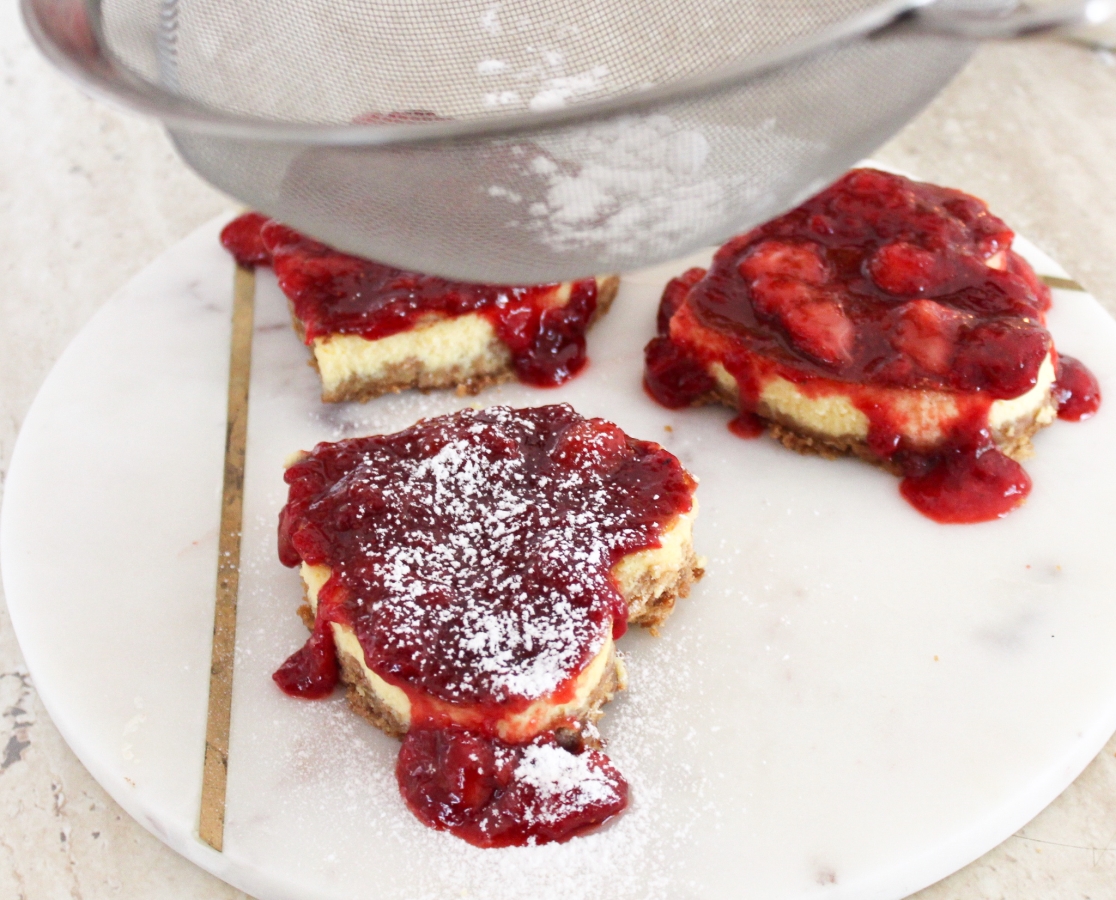
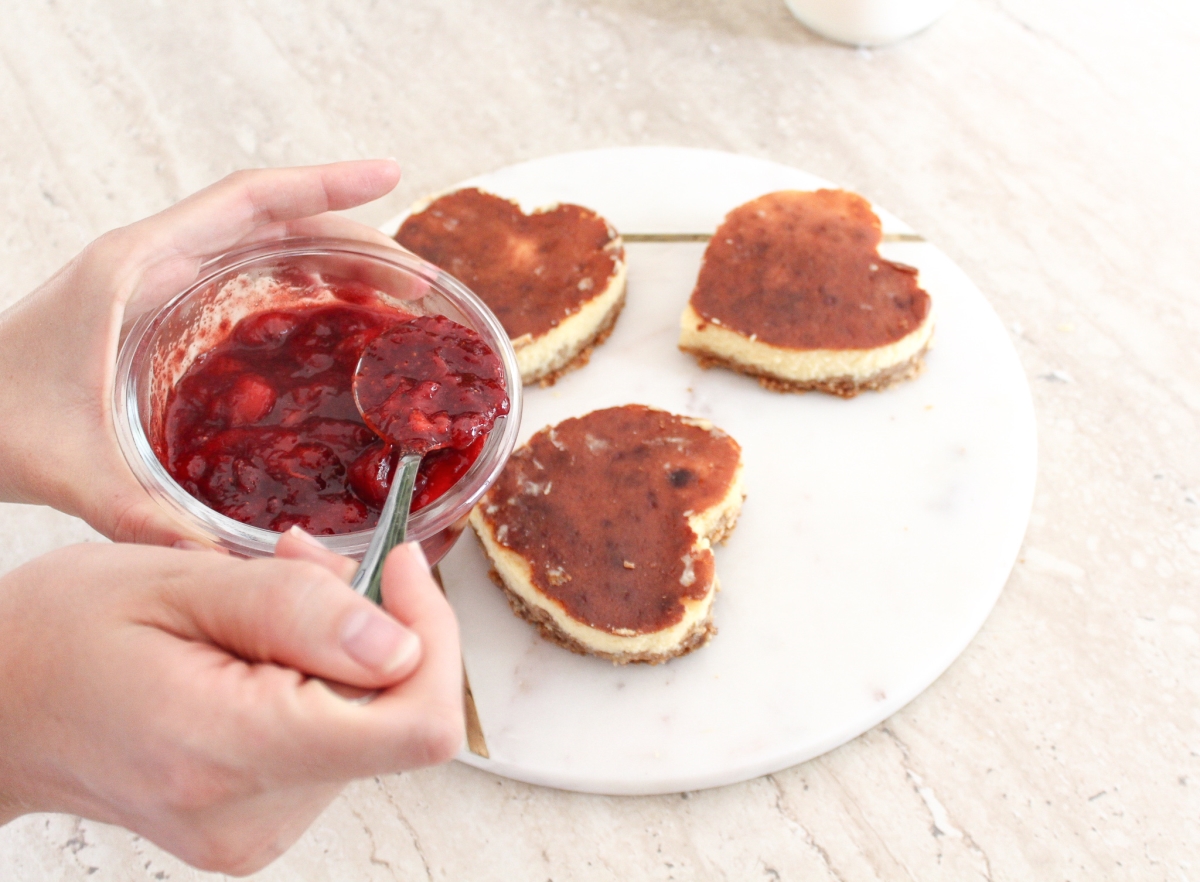
Once the sauce is cooled down a little bit, you can start spooning it on your heart-shaped cheesecakes. You can be as messy or as careful as you want with this step. I love the look of the dipping sauce, but I also think nice and clean looks great as well.
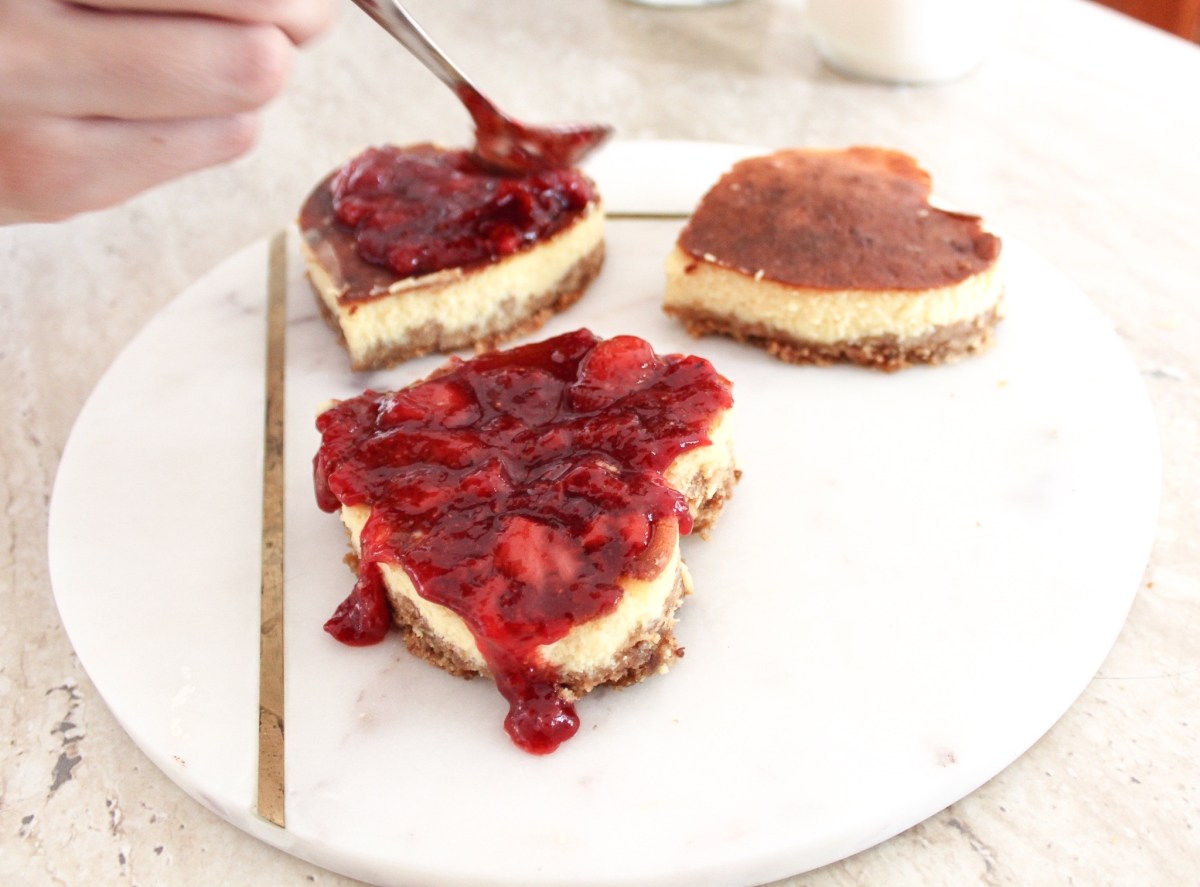
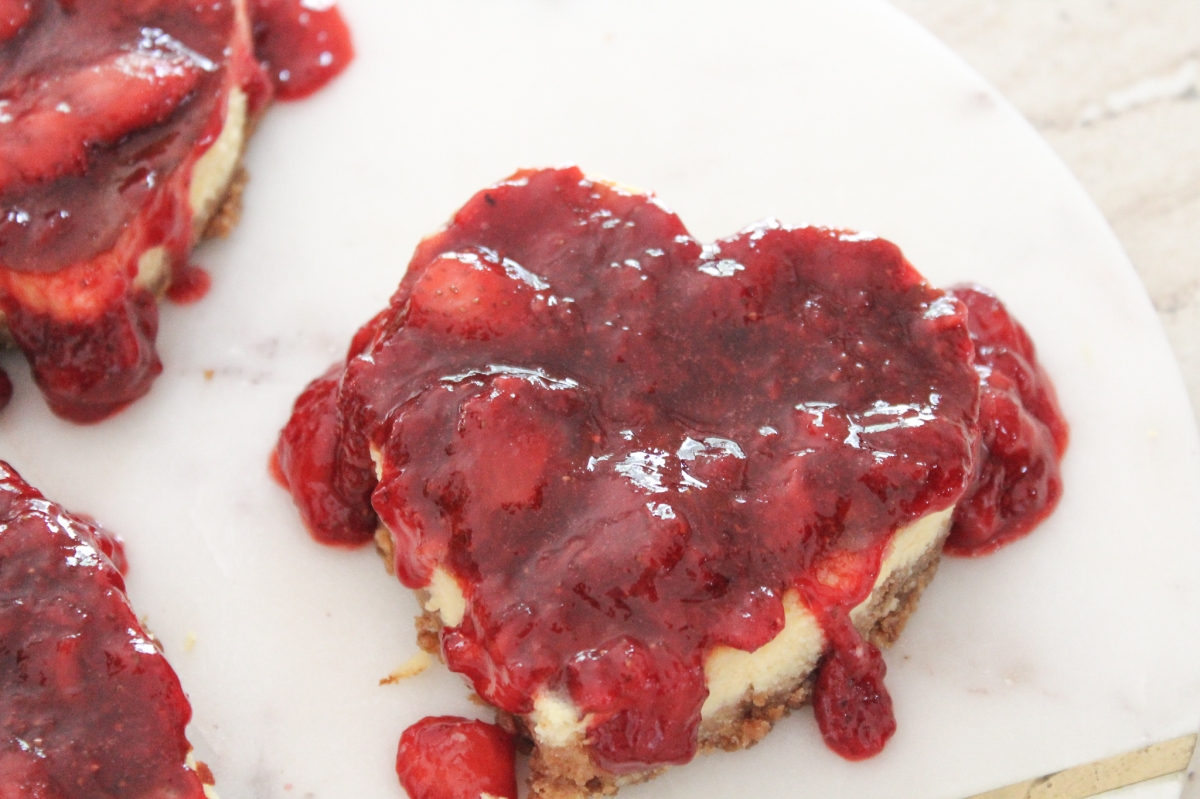

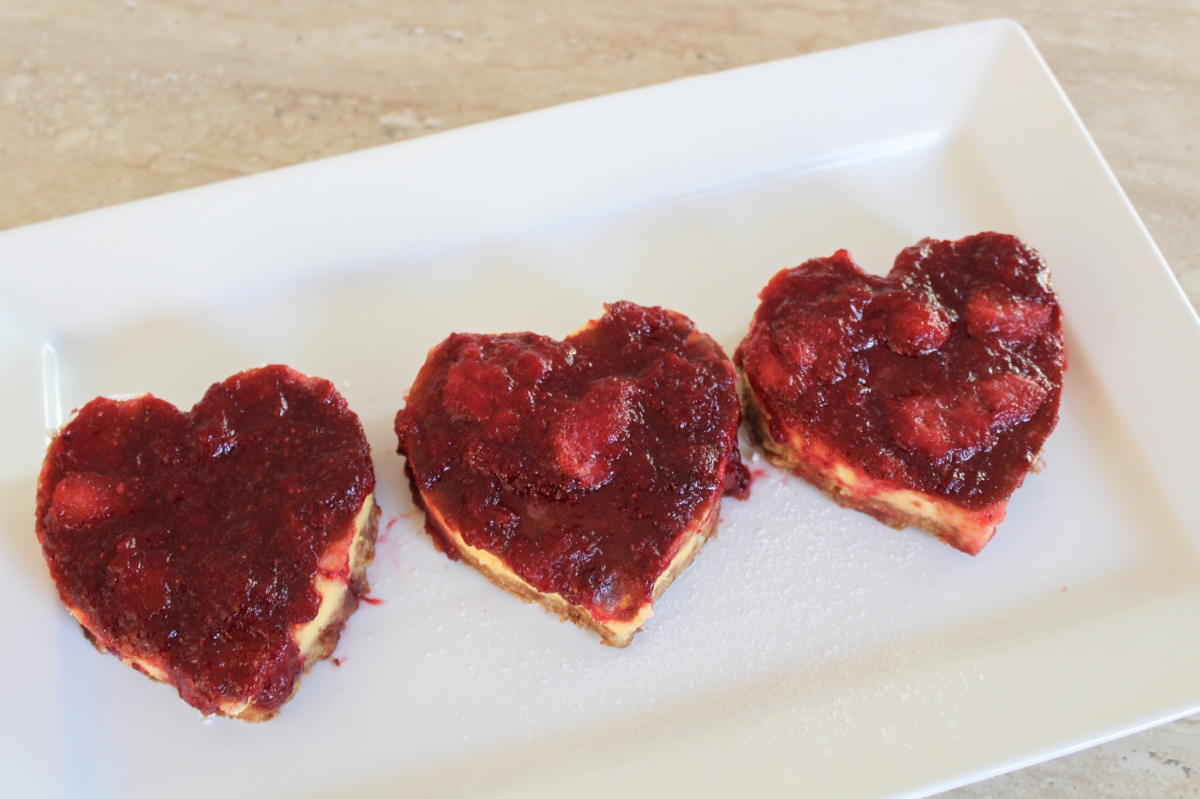
To finish off these delicious Heart-Shaped Strawberry Cheesecakes, I sprinkled on some powdered sugar and put them on a serving platter. I think these mini Heart-Shaped Cheesecakes turned out so well and if anything, they tasted amazing!
I highly recommend you give this Valentine’s Day inspired dessert a try! It’s super easy and super delicious and whoever you make them for will definitely be thanking you! Do you like to celebrate Valentine’s Day? Let me know in the comments down below!